Help Guide for Applicants

SmartyGrants provides an easy way for funding applicants to complete their applications online. This guide will explain the essential steps you need to take to complete and submit application forms.
Some of the features of SmartyGrants include:
You can save your progress and return to complete your application at your convenience,
Your application is stored online, therefore you can access it on other devices, and
You can be certain that the funder has received your application when you submit it.
Download a PDF copy of this guide below -

You have the option to create a SmartyFile profile for your organisation. SmartyFile allows organisations to collaborate with team members, pre-fill information into forms and manage, view, search and sort submissions across multiple funders in one spot.
To learn more, visit our SmartyFile help page.
Table of contents
Step 1 – Navigate to the funder’s application portal
To begin a submission, you’ll first need to navigate to the funder’s application portal. This link will typically end in .smartygrants.com.au. Each funder has their own unique application portal. You’ll need a link to this site before you can start. You can often obtain this link through the funder’s own website, in their promotional newsletters, or similar. Within each link, you can find any current and upcoming rounds listed for that funder. |    |
Tip: Take note of the web link (URL) you are using to access a funder’s application portal. You might even like to "Bookmark" the link or add the link as a "Favourite" within your web browser. This can be particularly helpful if you intend on creating multiple applications across different funders. | |
Step 2 – View the round and application form
To view the application form, select the name of the round or Find out more about (round name). On the round page, you will typically find key information about the round, such as the eligibility criteria, guidelines, dates and timelines, or similar. | 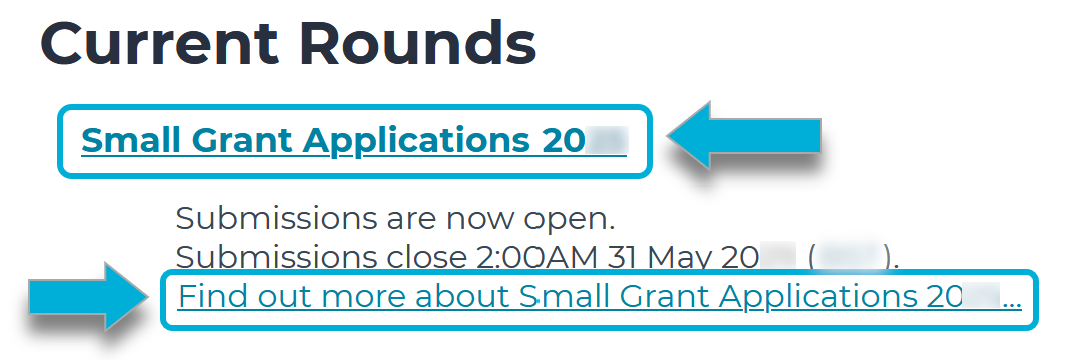 |
If the round is Current:
|  |
Note: You can't fill out the form in preview mode. | |
If the round is Upcoming, you may or may not be able to preview or download the form. This will depend on whether the funder has allowed for the application form to be visible before the round opens. If you don’t see the option to preview the form, you will need to wait until the round is open. | 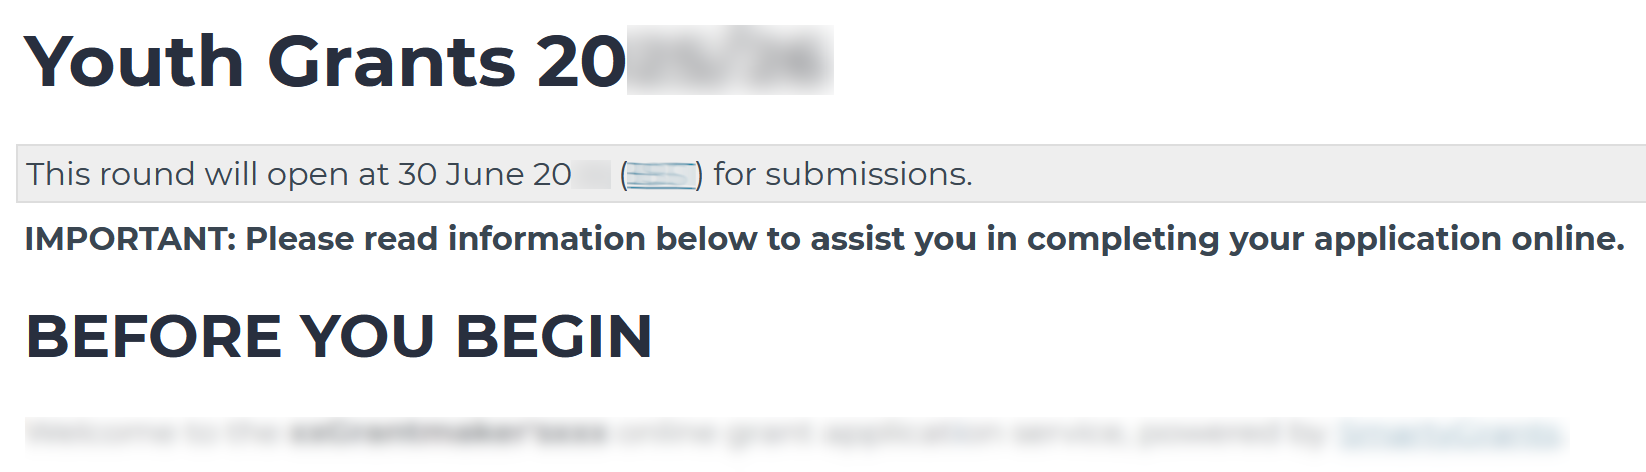 |
Step 3 – Login or register
You need a user account in order to start an application. If you have submitted an application via SmartyGrants before, you can log into your existing account. Otherwise, you will need to register. Note: Once you have registered your email, you won’t need to register again. This is true even if you want to apply to rounds from different funders. You can use the same user account to apply to any funder using SmartyGrants. | 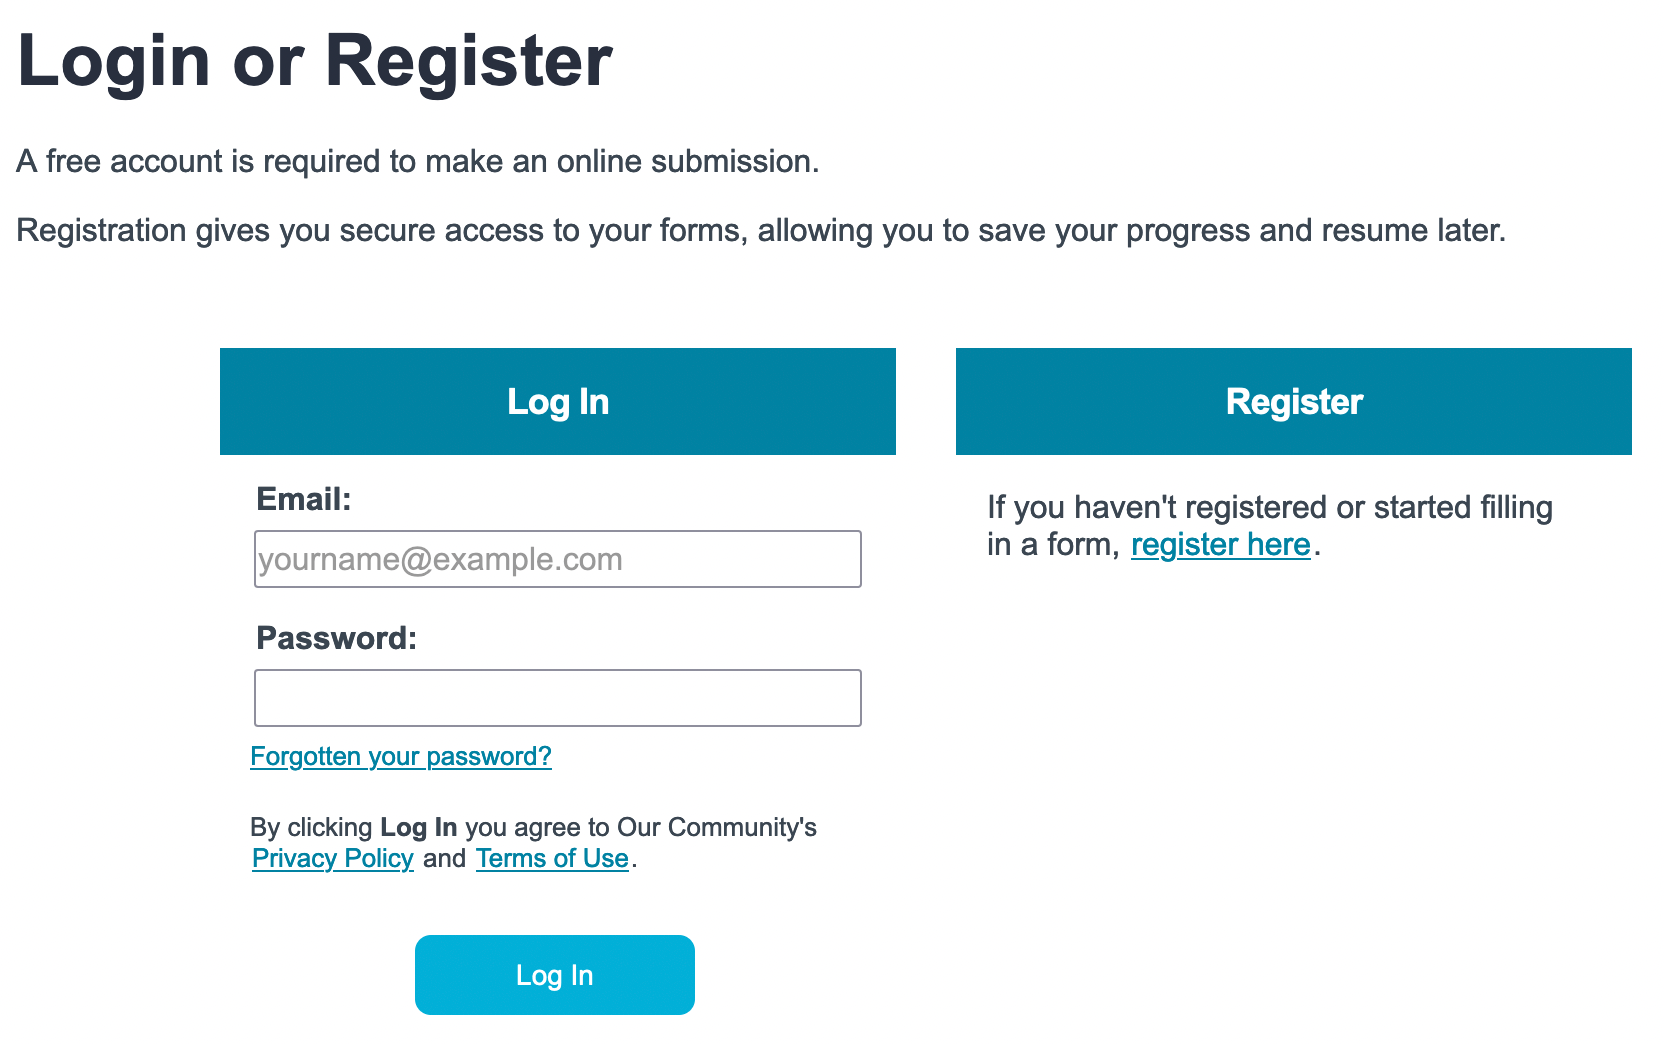 |
LoginTo login with an existing user account:
Note: If you’ve forgotten your password, see help on how to reset it here. | 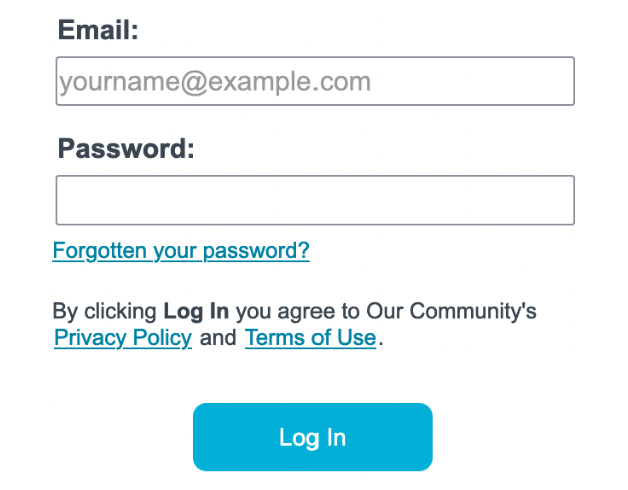 |
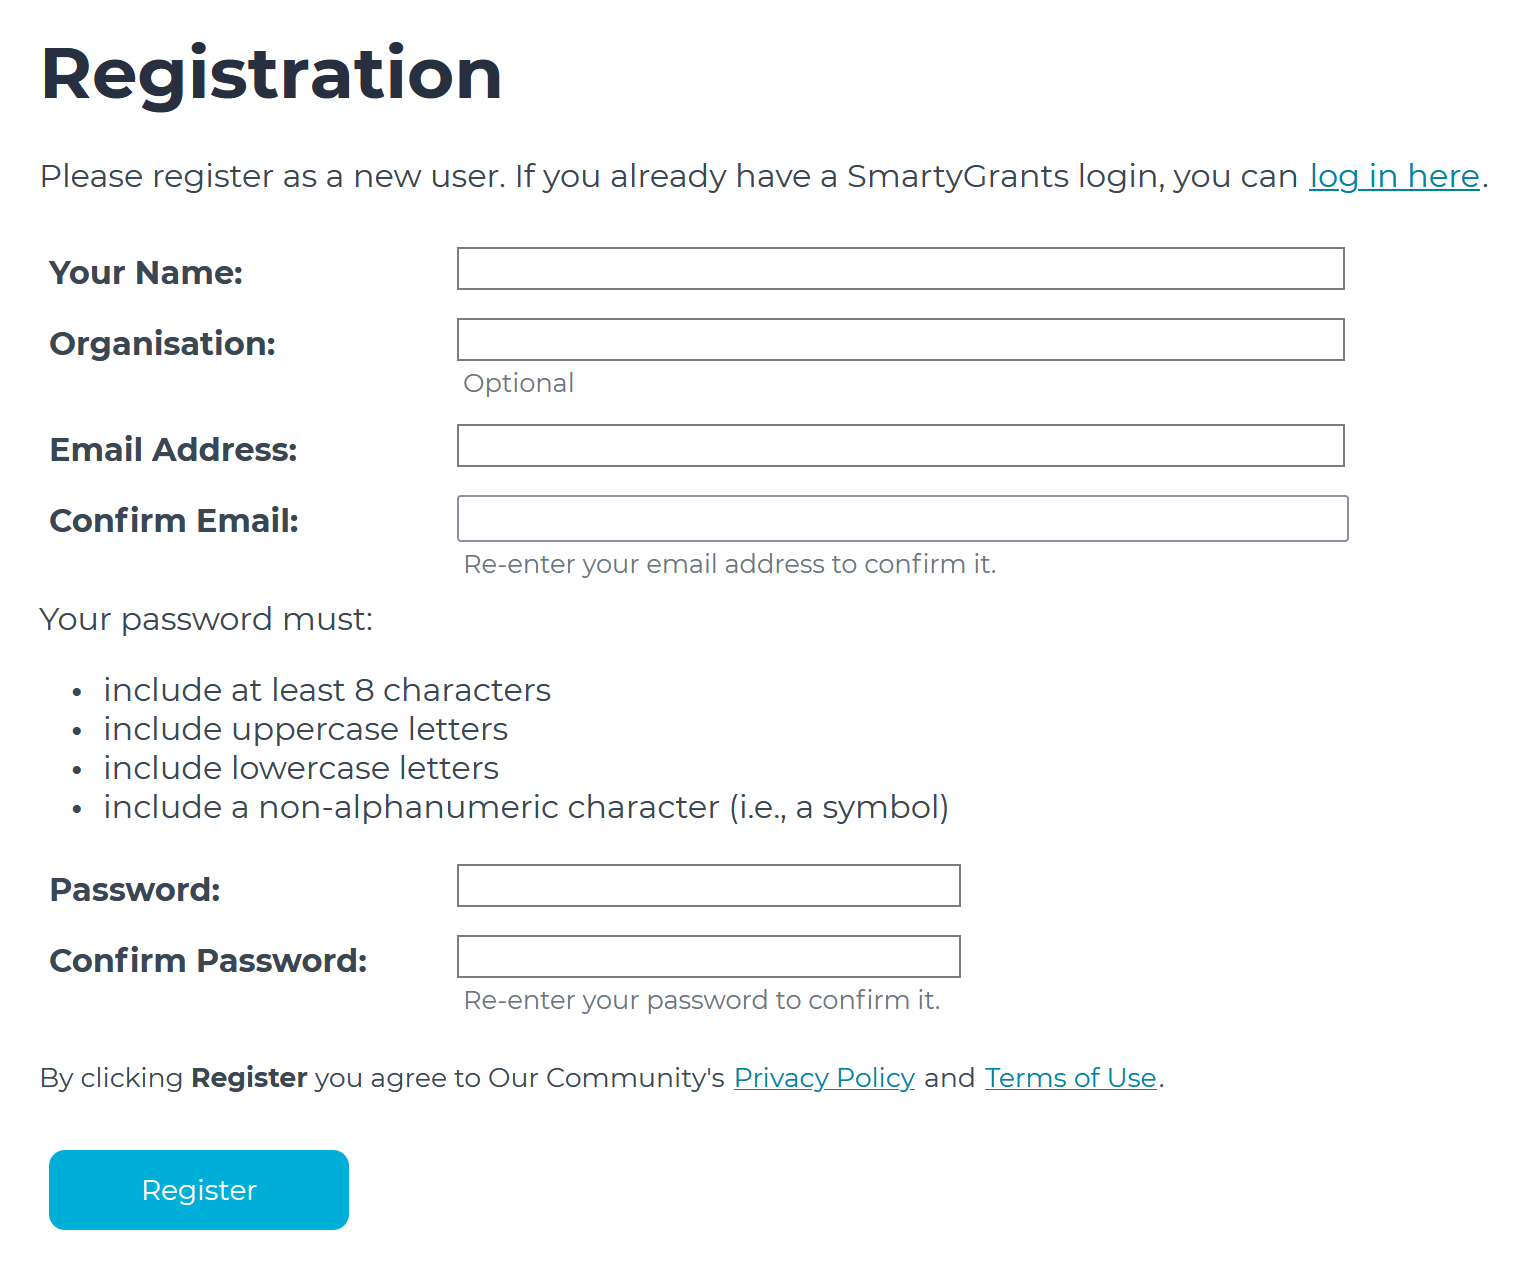
RegisterTo register a user account:
Important: An activation email may take up to 15 minutes to arrive. If you don’t see the email in your inbox, check your junk or spam folder.
|   |
Important: You won’t be able to login until the account is activated. | |
Note: You won’t receive an activation email if you already have a SmartyGrants account under that email address. If this is the case, you can reset your password to log in. | |
Tip: If you’re ever applied for funding via the SmartyGrants portal before, you’ll have an existing user account. You can use that same account to apply, even to a different funder - just log in using that email address and password. If you’ve forgotten your password, see help on how to reset it here. | |
Step 4 – Start an application
To begin an application, select the name of the round or Find out more about (round name). | |
If you have not logged in, select Start a submission. You will be prompted to log in. |  |
If you have already logged in, then select Fill Out Now. |  |
Step 5 – Fill out the application form
Session timer & saving your progressWhen you log into SmartyGrants, you are on a timed session. This timer is 20 minutes. While filling out a form, you can reset the timer by any of the following actions:
| |
Important: If you do not save or navigate between pages within 20 minutes, you’ll be timed out. Timing out will log you out, and you’ll lose any unsaved work. | |
If the session times out, you will be shown a Log In prompt. If you successfully re-enter your login details, you will be returned to the page you were viewing. You should then select Save Progress to save any unsaved data. To avoid losing your work we recommend that you save regularly - at least once every 10-15 minutes. | 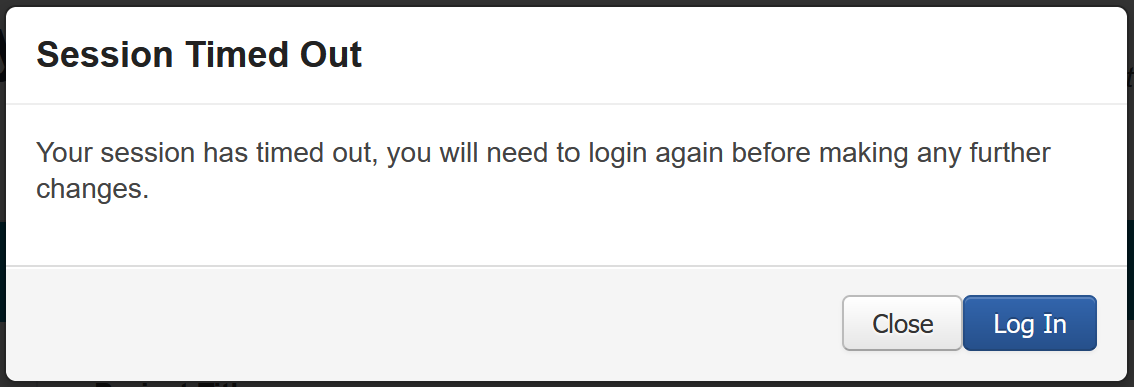 |
Page ButtonsUsing these buttons will allow you to navigate between different pages of a form. They are found at the top and the bottom of the application form. You can also Save Progress, or Save and Close your form to return to it later. |  |
Note: Your application form is automatically saved every time you navigate between pages. | |
Navigation PanelYou can also navigate between pages using the Form Navigation panel. The panel is found at the top of the page. Each line of text represents a different page in the form. Select the name of the page to jump to that page. | 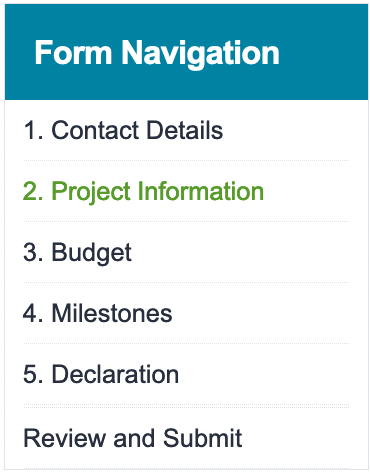 |
Form Questions/FieldsProvide responses to the questions/fields in the form. Depending on the form you are filling out, you may be asked to provide your responses/answers using a variety of different methods. In addition to typed responses, some forms may require you to select specific elements, tick a checkbox, upload a file, and more. | 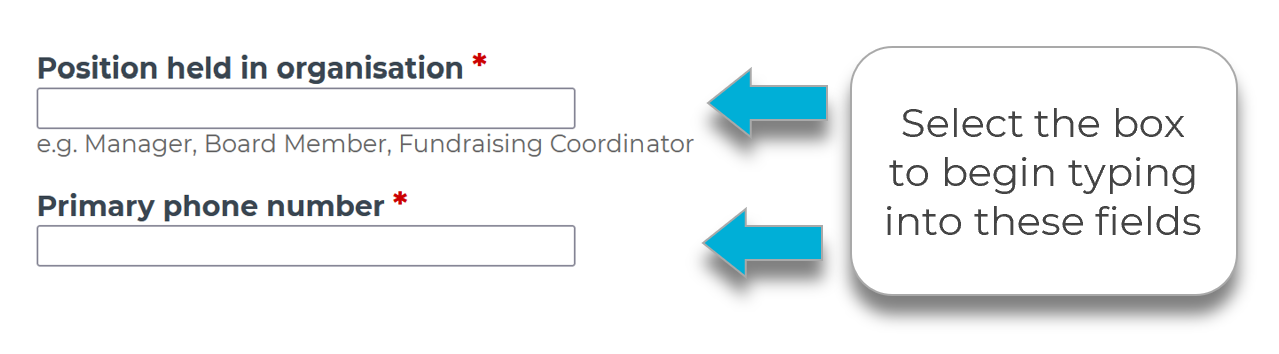
|
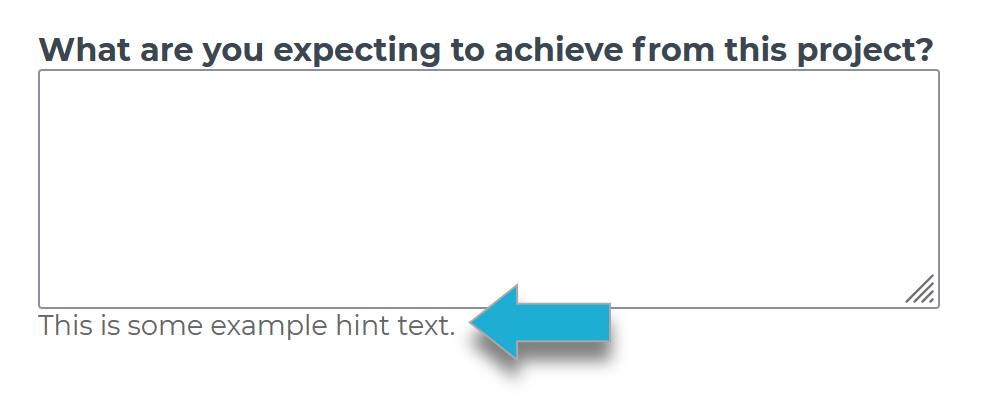
Note: Hint text can be found below or on top of some questions. This hint text can guide you on what response, and in what format, the funder is expecting you to provide. | |
Below are some examples of fields that you may come across: | |
Date fields: Choose a date to enter in. You can either type in a date manually, or select the calendar icon to pick a specific date from the calendar window. | 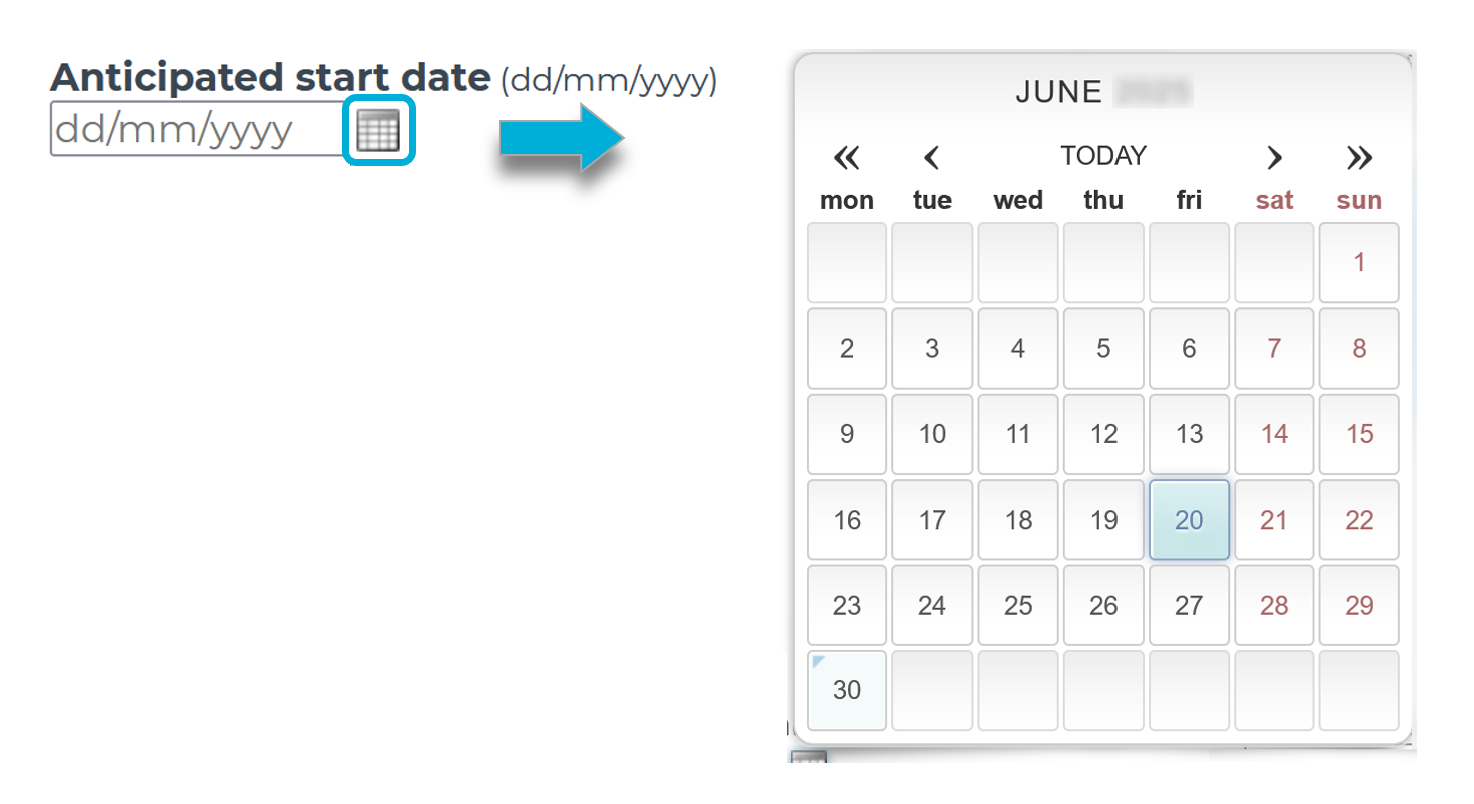 |
Location fields: Start typing in an address. Select the relevant suggested result, or if the address does not appear from the suggested results, select Can’t find your address? to manually enter in those address fields. Some forms may also display a map of the address when entered into an address field. | 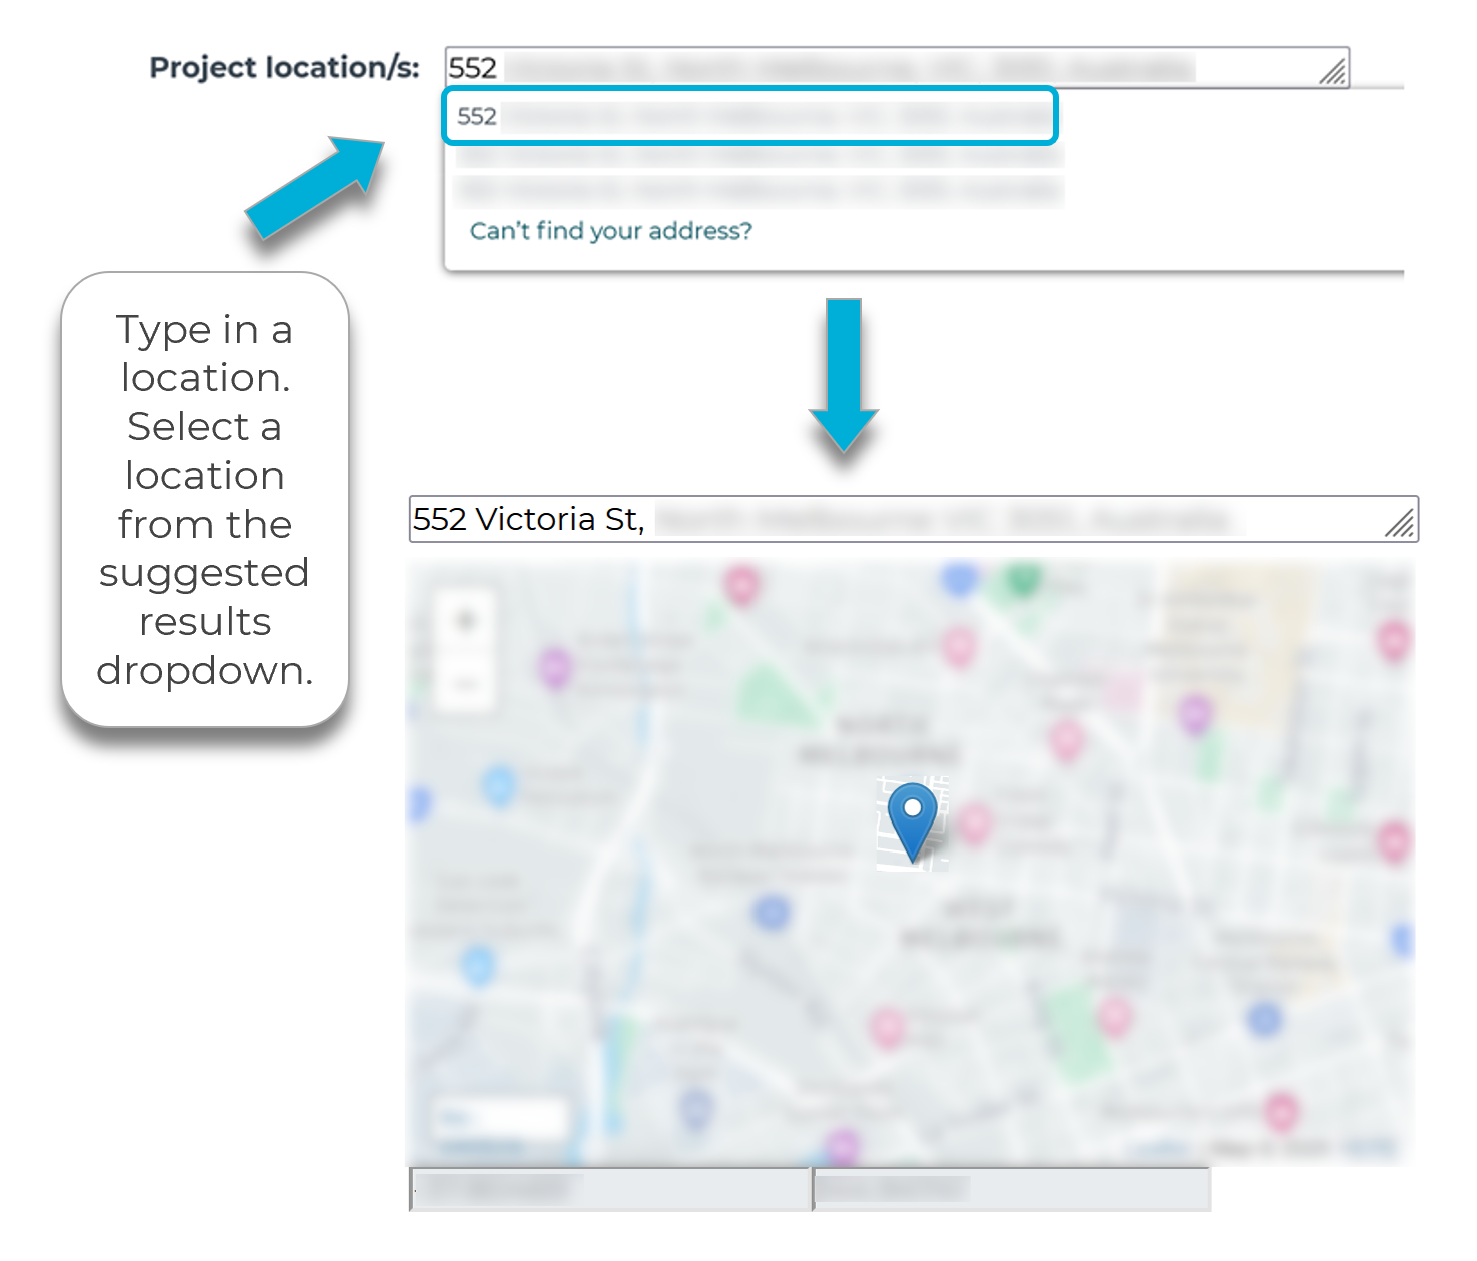 |
Nested lists: You may need to ‘drill down’ to select an option from a drop-down list. After selecting Browse, you can navigate the window to the relevant category (in bold). Selecting the category will expand the options shown. You can select any non-bold option underneath. Depending on the form, you may be able to select Browse again to add multiple responses. | 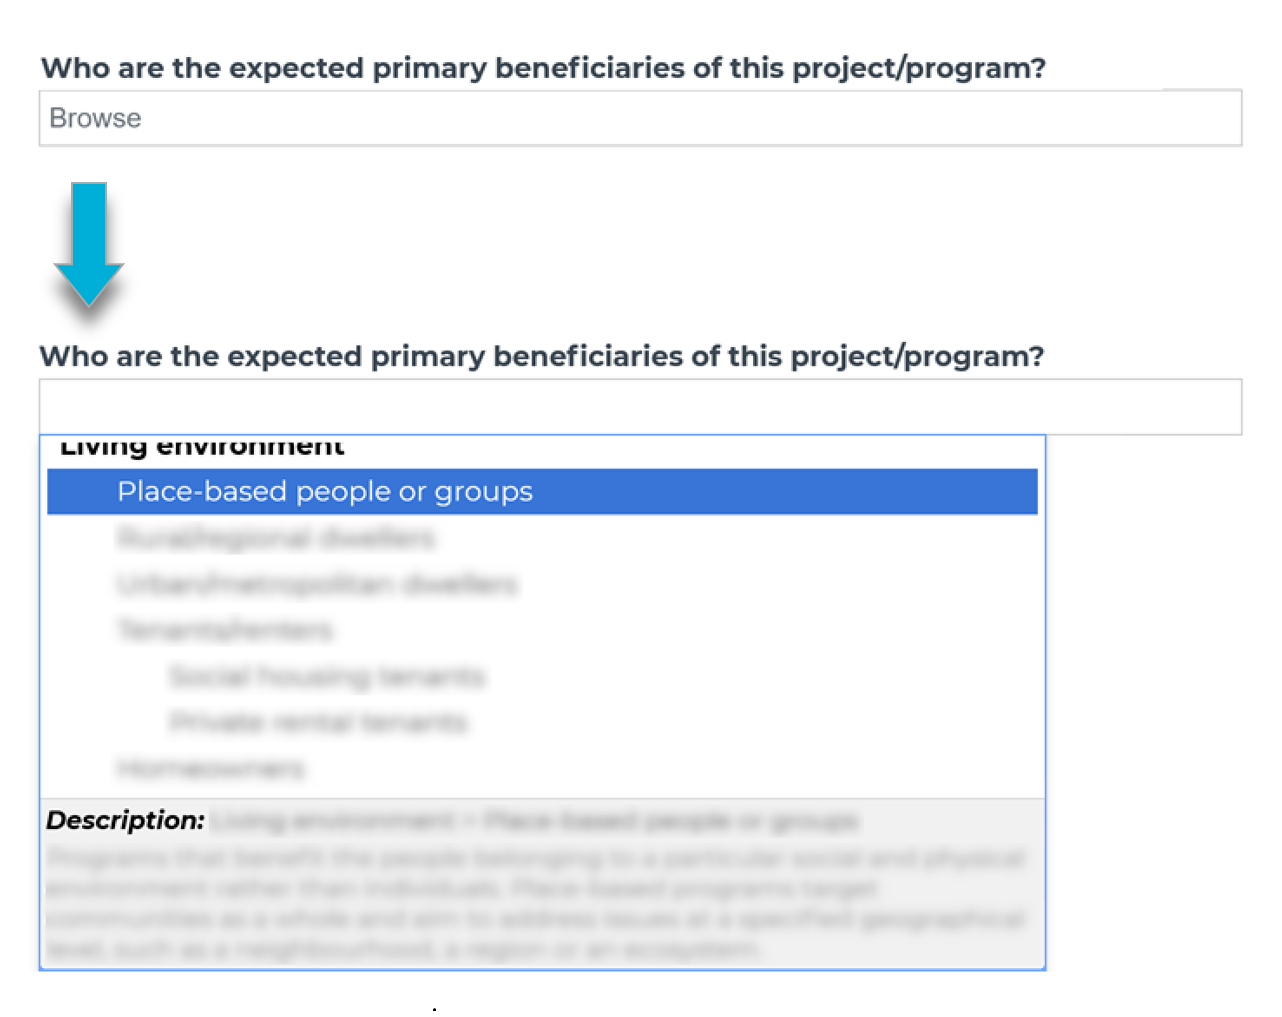 |
Save and close (return to the application later)If at any stage you wish to save your application and return to it later, you can do so by selecting Save and Close. You can return to your application at any time (prior to the closing date of the grant round) and continue your application, simply by logging back into your account. Once you log back in, you can select My Submissions to be taken to the My Submissions page - where you will find a listing of all your applications, including those that you have started to fill in or have already completed. | 
|
Attaching/uploading filesIf you are attaching files, you need to allow for sufficient time for the file to be uploaded to the page. Do not navigate to another page until the file has been successfully attached, otherwise the file upload will be cancelled. For a full list of supported file types, visit our page here. | |
Note: There is a maximum file limit of 25 megabytes. However, it is strongly recommended you try to keep files under 5 megabytes. | |
To attach a file, you will be given a Choose files option or a Browse… option (depending on the browser you use). After selecting either option, search for and select the file you wish to attach. The file will begin to upload. When the upload is complete, a link to the uploaded file will be available along with the option to remove the file. Note: Ensure that your file is named clearly to avoid confusion. | 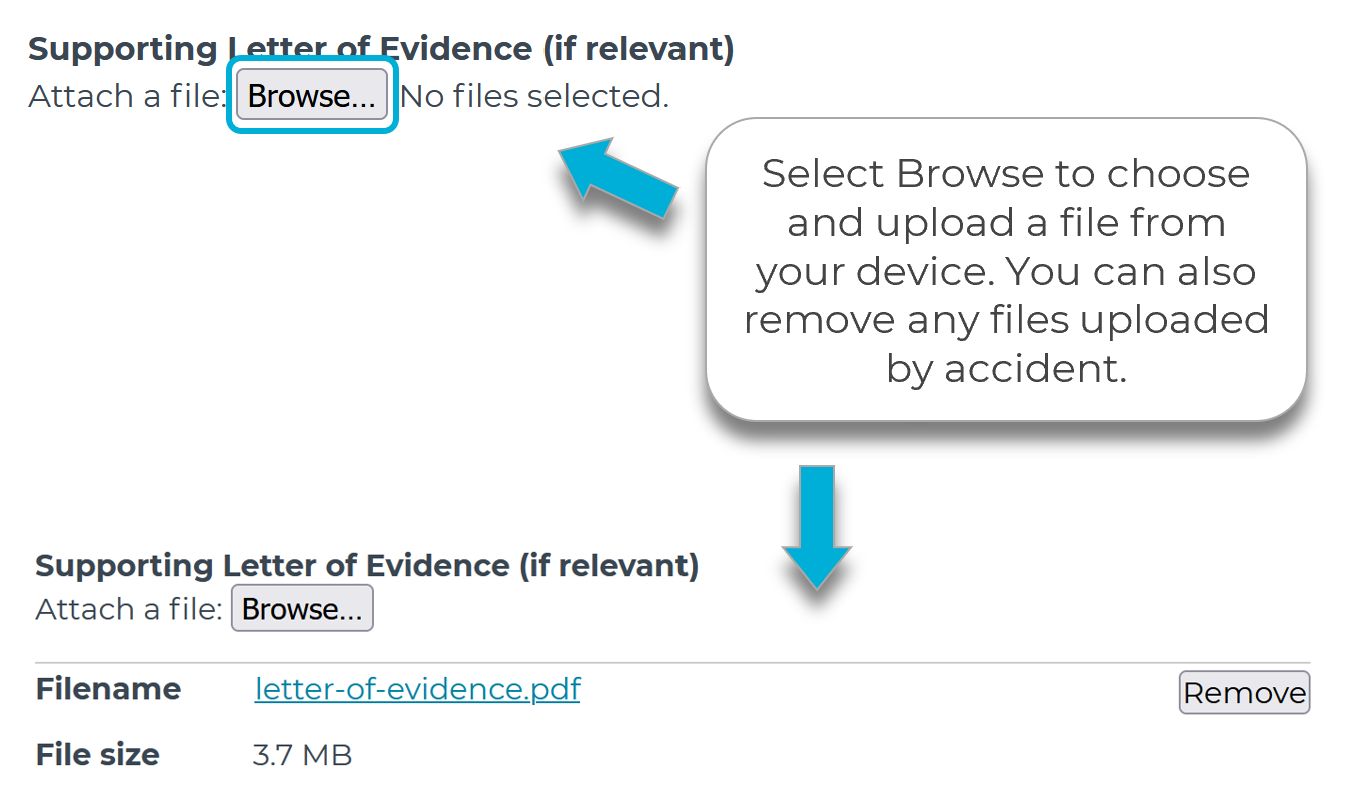 |

Step 6 – Review and submit
When you have completed the last page of the application form, you can select Next Page button, which will take you to the Review and Submit page. This page allows you to review your entire application in full before you submit it to the funder. You can also access this page by clicking on the bottom entry of the Form Navigation panel. |  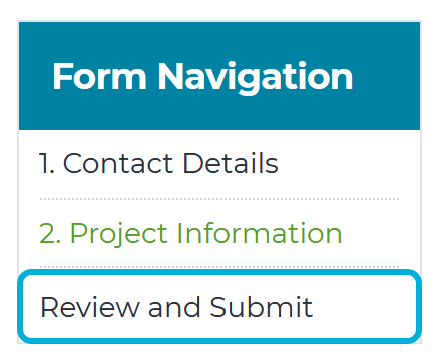 |
Any items that need to be addressed before you can submit – for example, a required field that has been missed – will be highlighted in red. You can navigate to the relevant page to make any edits by selecting the Go to page button. For help with troubleshooting any errors, you can read our guidance here. | 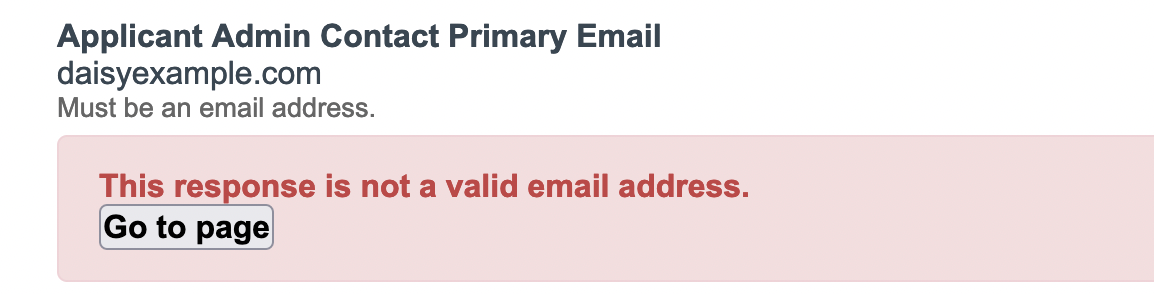 |
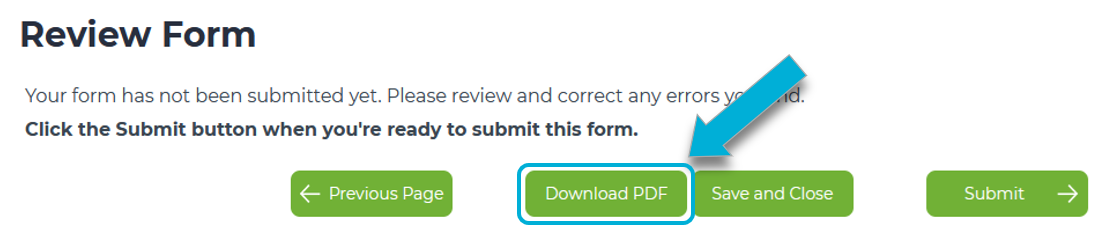
If you’d like to save a PDF copy before you submit, you can follow the steps here. Just note that you’ll automatically receive a PDF copy of your application attached to the confirmation email after you submit. When you have reviewed your form and are ready to submit, select the Submit button. | 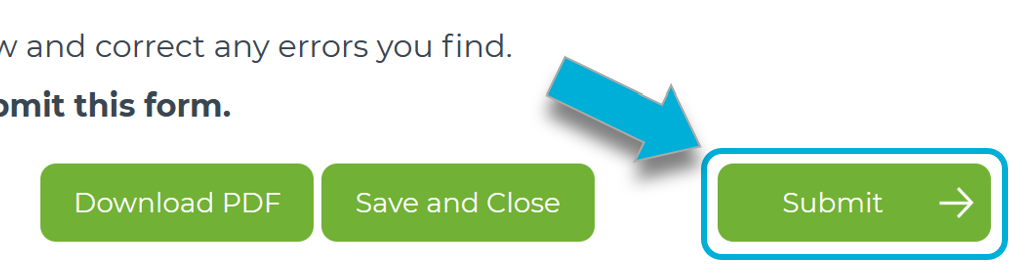 |
Important: Once your form is submitted, you can’t make any changes. If you want to update or change the form, you'll need to contact the funder directly and ask whether they can re-open the form for you. | |
Step 7 – Confirmation
After you have selected the submit button, you will receive a confirmation message on screen that your application has been submitted and the funder has received your application. You will also receive a confirmation email with a PDF copy of your submission attached. Note that this PDF copy won’t include any files you’ve uploaded, however, file names will still be listed on the PDF for reference. |  |
Addendum: Multiple forms in one application
Some funders may require you to fill out multiple forms under a single Application ID. To see any additional forms, you will need to be logged into your account on the funder's application portal (ending in .smartygrants.com.au). While on the My Submissions page, you have two options to access those forms: | |
Option 1: Select the Application ID. A pop-up window will appear with additional information about the application. Select the name of the form you wish to access. |   |
Option 2: Next to the Application ID, on the bottom-right hand side of the box, select the small downward-facing arrow. In the list of form(s) that appear, select the name of the form you wish to access. |   |
Once you’ve clicked on the name of the form, you will be taken to the form fill-out page.
|    |
Optional steps
Optional – Viewing / saving / printing applications
Downloading and printing your applicationIf you wish to save a copy or print your submission, you will need to first download a PDF copy. There are a few different ways you can download one. | |
In-Progress forms
|  |
Submitted forms
Once you have a PDF copy of your submission, if required, you can print this file from your PDF viewing program of choice. |  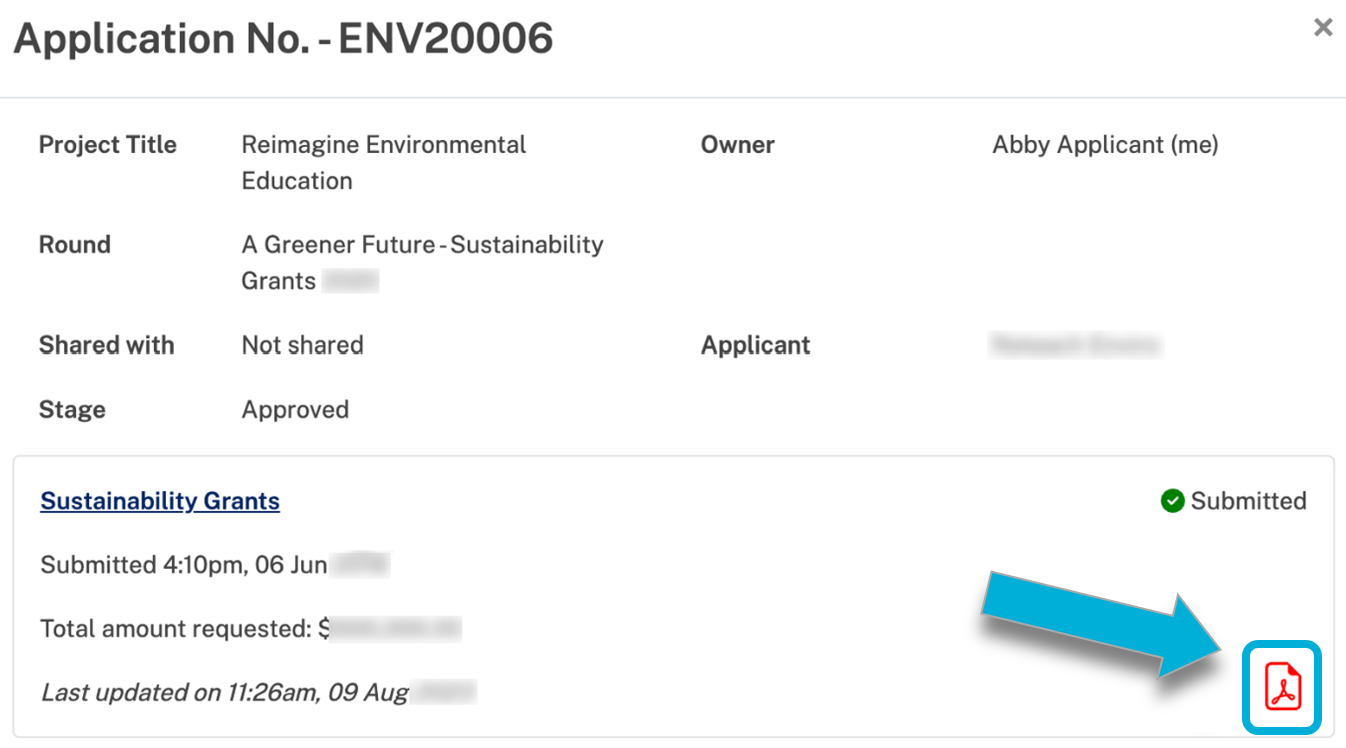 |
Accessing additional application informationInformation about an application can be viewed by selecting the Application ID number from the My Submissions page. This will show a pop-up with additional information. See an example below:
|  |
Accessing acquittals or subsequent formsFunders may add additional forms into your existing submission, such as acquittal or milestone reports. You can visit the steps here for help on how to access those additional forms. | 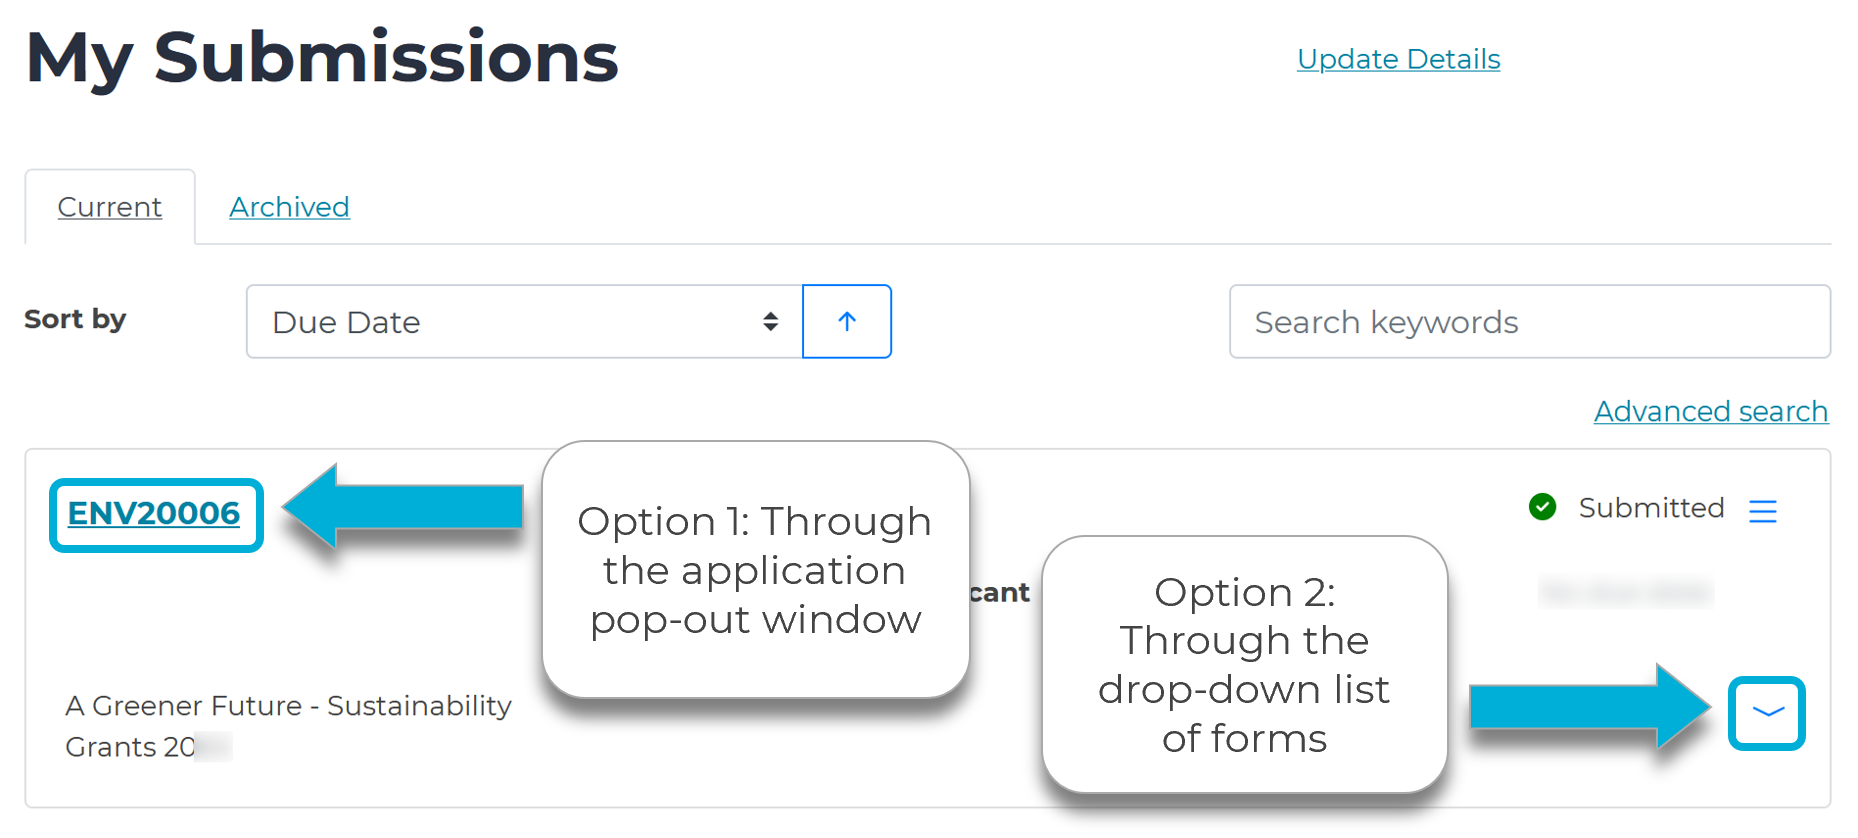 |
Optional – Submitting multiple applications
Start another submissionDepending on the funder, you may be able to submit multiple submissions in the same grant round. To start another submission, you must return to the Current Rounds page (select the Current Rounds link in the top right hand corner), and select the name of the round again. In this page, you’ll be notified that you have already made a submission. Select Start New Submission to begin a new application. |  |
Multiple submissionsTo view and access all your submissions, you will need to be logged into your account on the funder's application portal (ending in .smartygrants.com.au). Your submissions will be on the My Submissions page (which can be access by selecting the My Submissions link). Tip: If you want to see all of your submissions across all funders at the same time, you can log into SmartyFile via http://app.smartyfile.com.au. You’ll use the same email and password that you used to log into SmartyGrants to log into SmartyFile. | 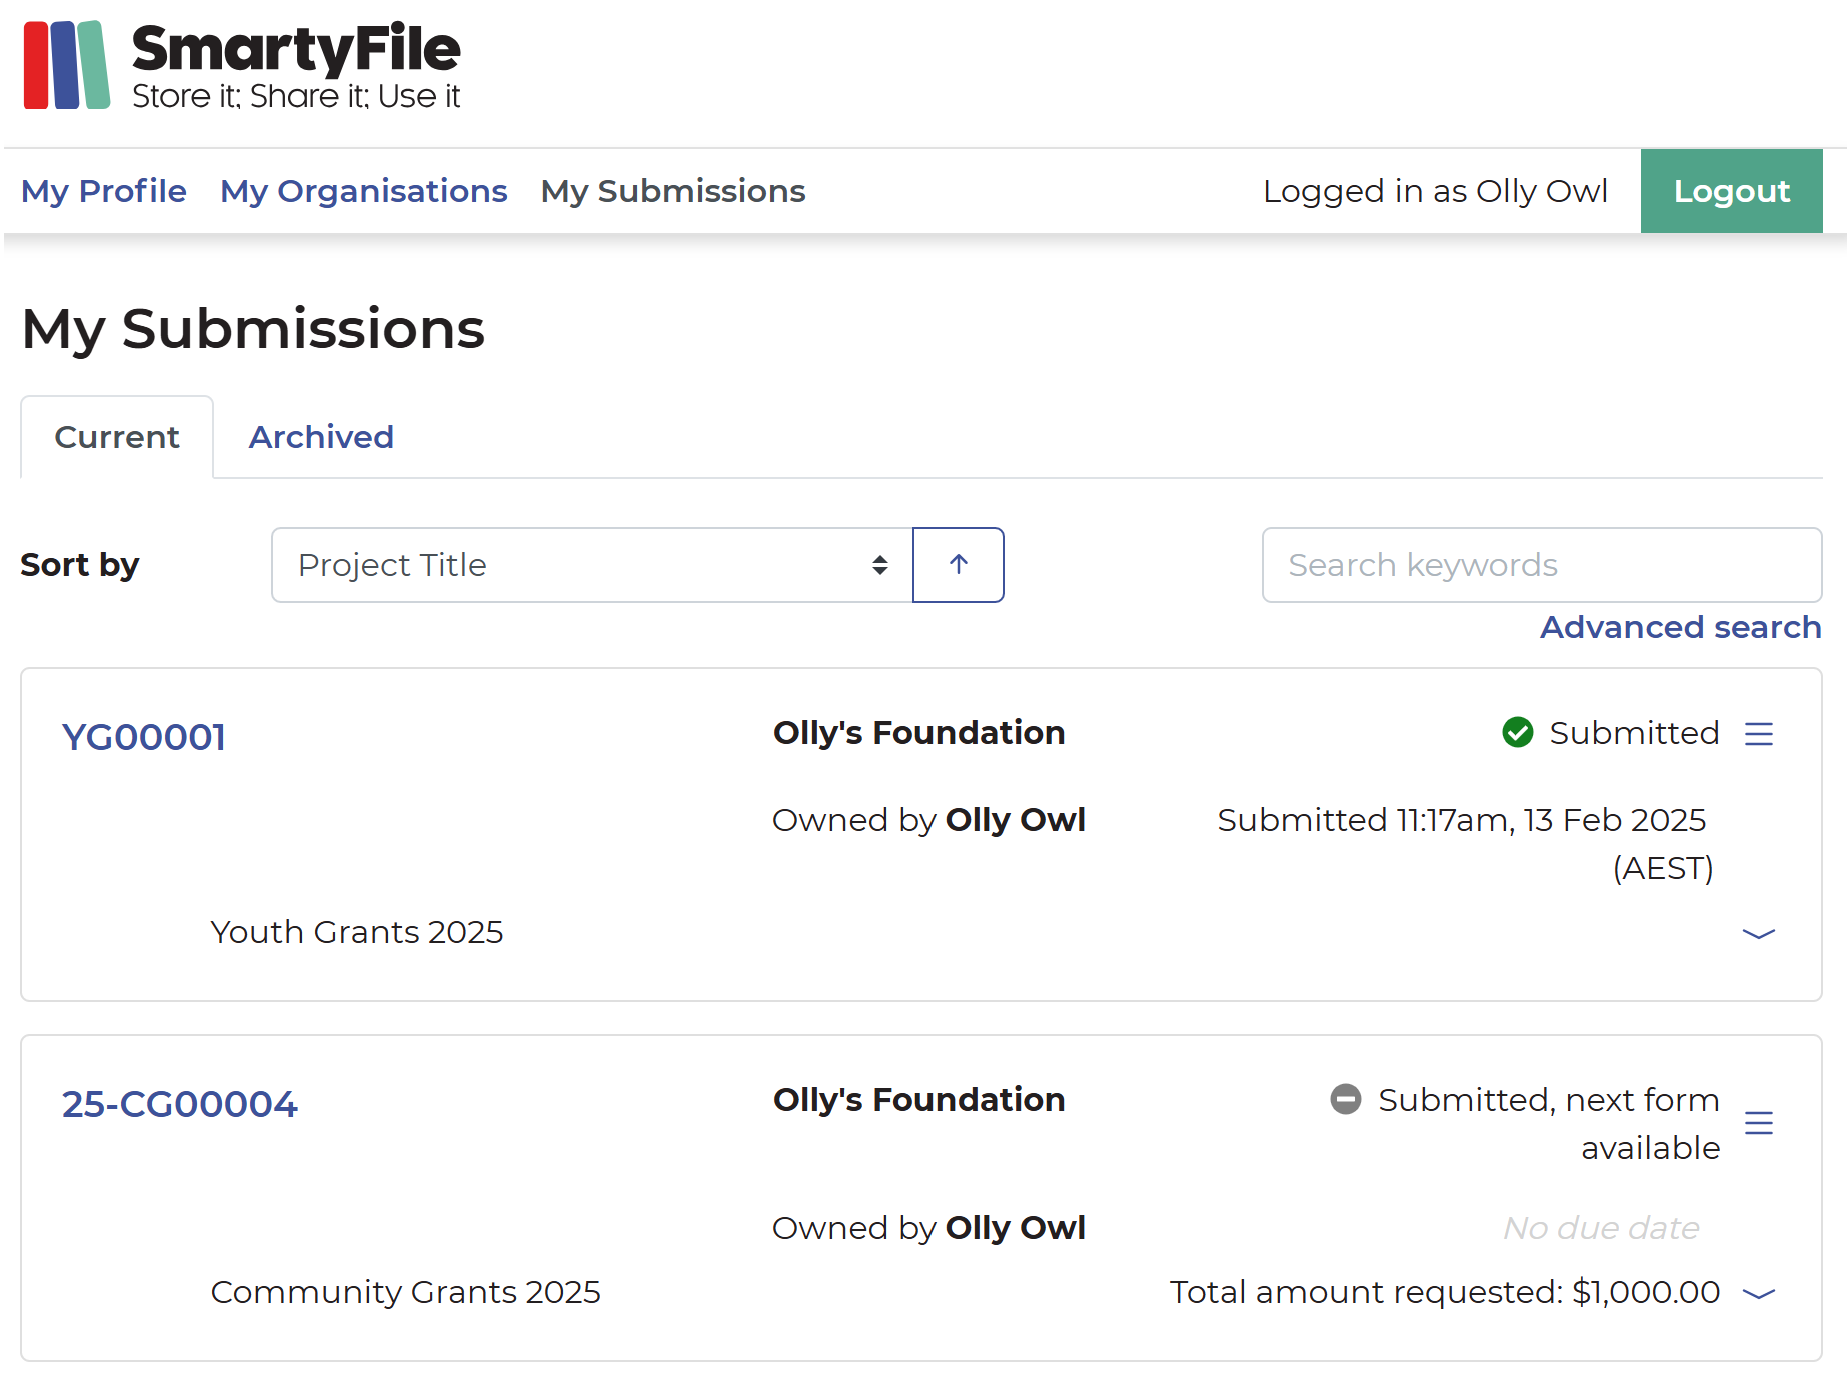 |
Multiple forms under one applicationSome funders may require you to fill out multiple forms under one application. You can visit the steps here for help on how to access those additional forms. |
Optional – Request a variation
For certain applications, you may have the option to request a variation form. If this is applicable to you, to request a variation:
If you need to request a variation to your grant agreement, but the Start a Variation request button is not available, please contact the funder directly. | 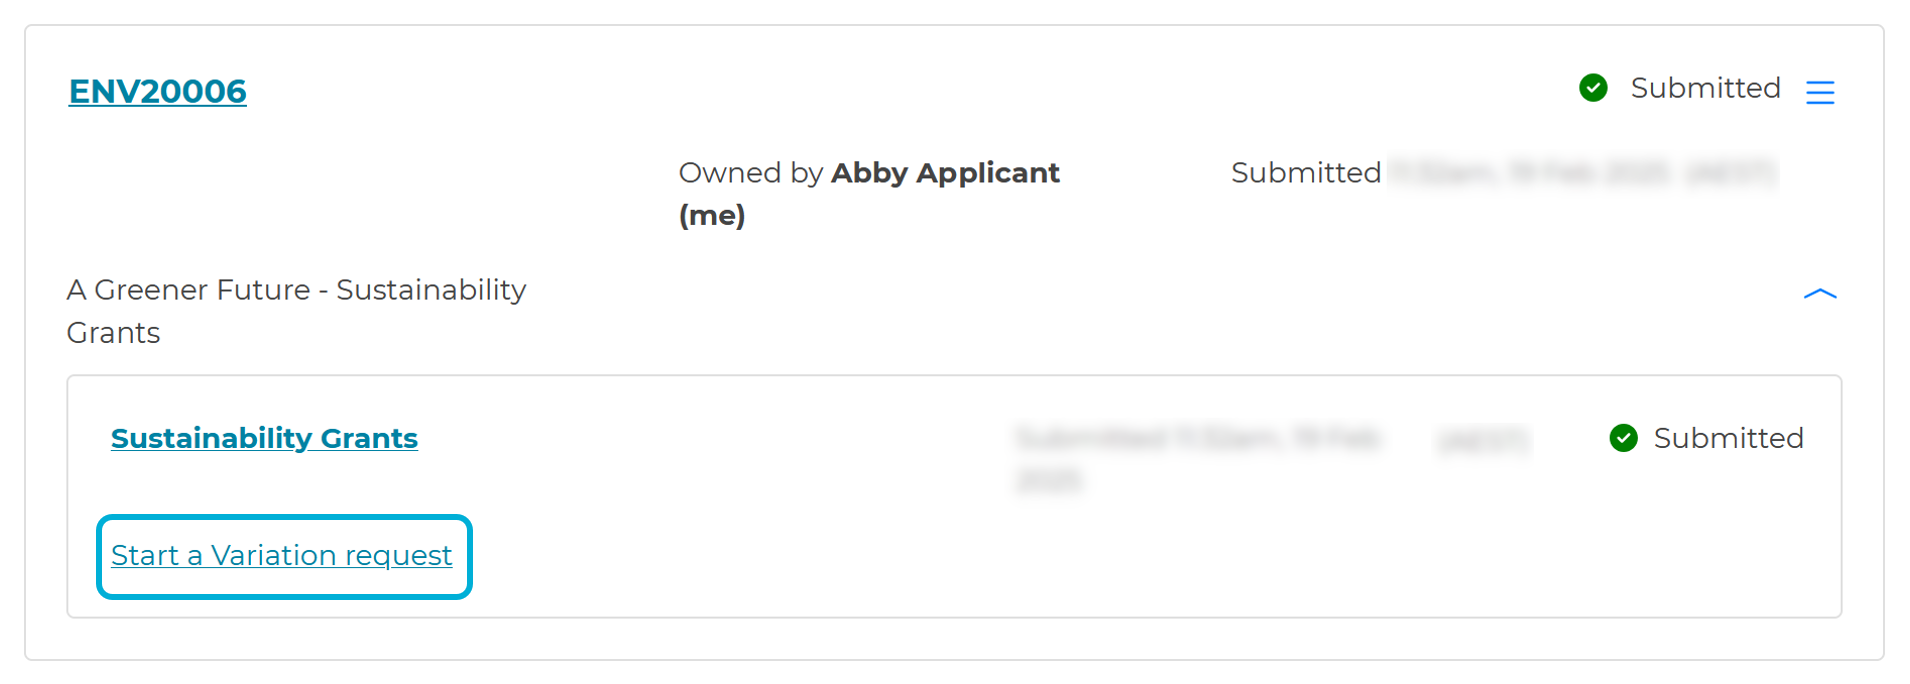 |
Optional – Change owner of a submission
If you want to update the owner/user of an application: |
If you applied as an individualOption 1: You can contact our support team. You’ll need to contact us from the email address that currently owns the application, and in that email, you’ll need to include the application ID along with the new owner’s email address. Option 2: If you do not have access to the email address that owns the application, you'll need to contact the funder directly to request the change. |
Note: Transferring an application updates the owner only. It does not update any contact details previously submitted in any form. To update those contact details, please contact the funder directly. |
If you applied on behalf of an organisationYou will need a SmartyFile organisation profile to make this change. If you do not already have an organisation profile, you can create one and add team members by heading to http://app.smartyfile.com.au. Once you (or an administrator) has added in team members to your organisation profile, you can change the owner on a submission. For more instructions, please visit https://applicanthelp.smartygrants.com.au/smartyfile/. |
Optional – Share a submission
If you want access to share a submission, you will need a SmartyFile organisation profile. If you do not already have an organisation profile, you can create one and add team members by heading to http://app.smartyfile.com.au. Once you (or an administrator) has added in team members to your organisation profile, you can share the submission with team members who have been given the appropriate permissions. For more instructions, please visit https://applicanthelp.smartygrants.com.au/smartyfile/. |
Optional – Update your account details, email address, or password
Once logged into the application portal (site ending in .smartygrants.com.au), you can update details associated with your account including your name, email address (i.e. your login username), or your account password. This can be done from the Edit Details page. To do so:
| 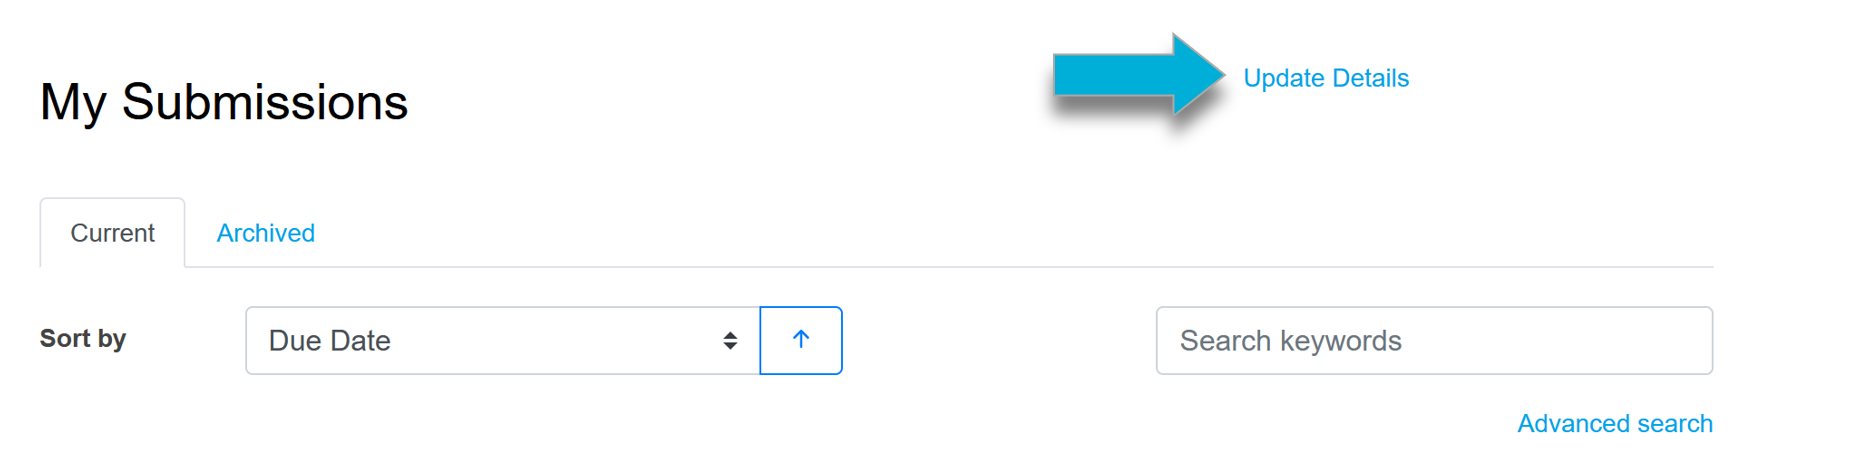 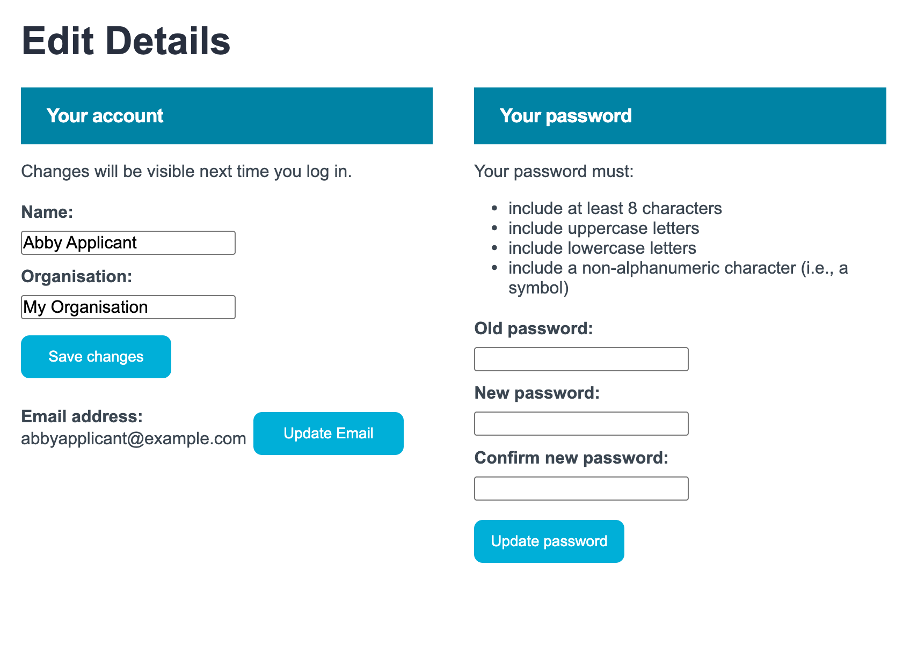 |
Update your name or organisation name
|  |
Update your password
|  |
Update your account email address
Note: Your username remains unchanged until the change is accepted via the link sent in the verification email. | 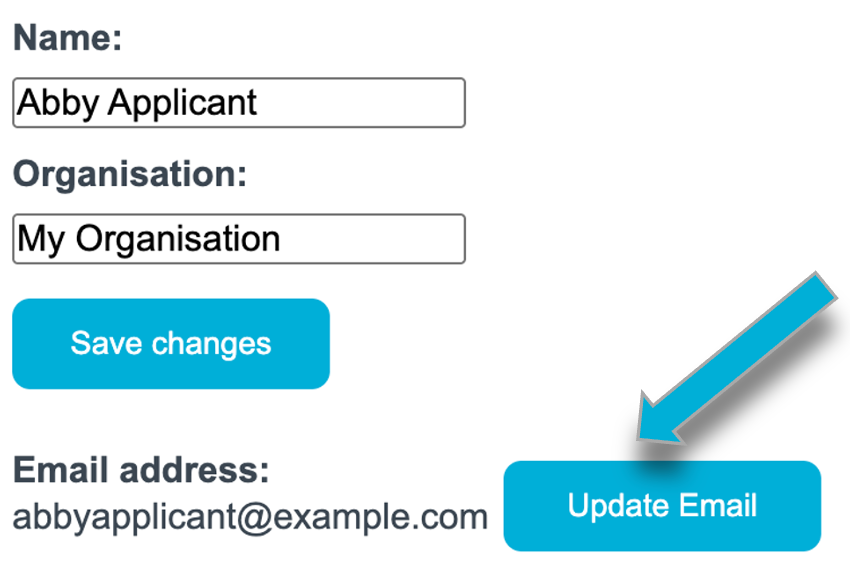 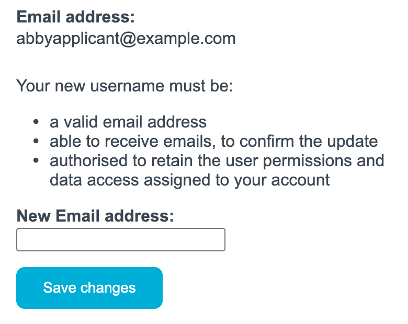 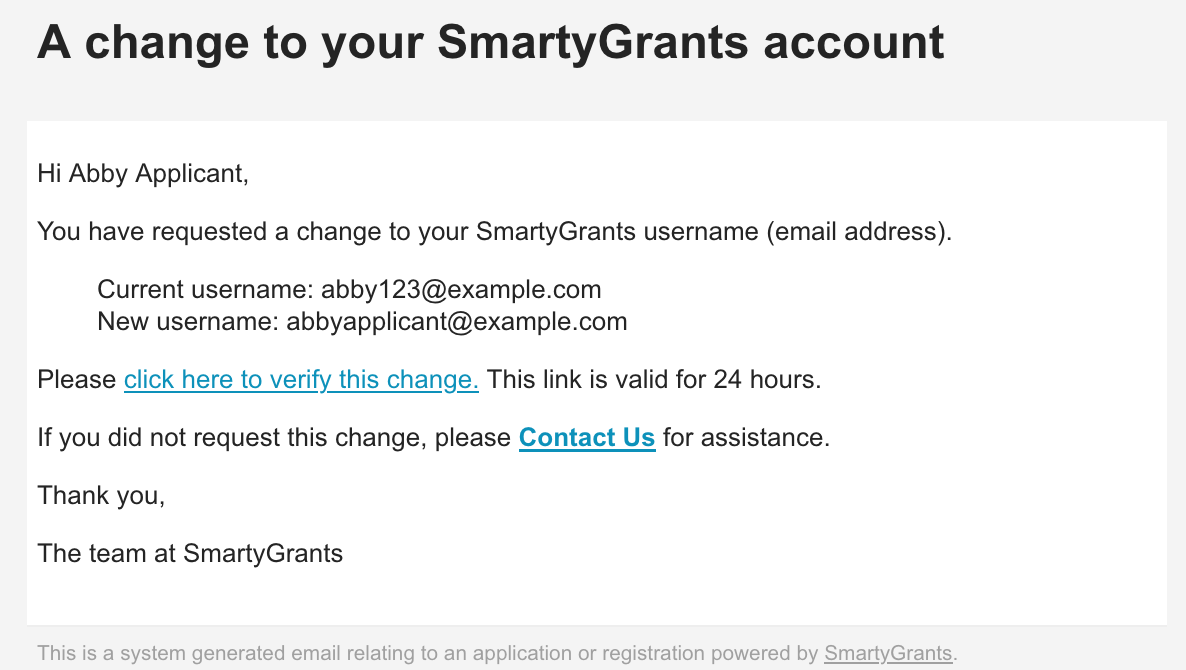 |
Optional – Delete & Archive submissions
DeleteYou have the ability to delete In Progress submissions only. To delete an In Progress submission, you’ll first need to log into the funder's application portal (ending in .smartygrants.com.au). Once logged in:
| 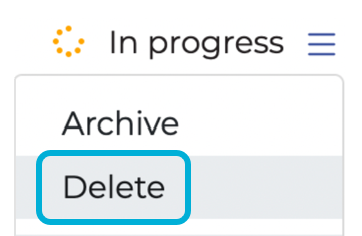 |
Warning: Deleting an application cannot be undone - this is a permanent action. If you wish to proceed, select the red Delete button. |  |
Applications with a Submitted status cannot be deleted. If you’d like to withdraw your application for any reason, we recommend contacting the funder directly. | |
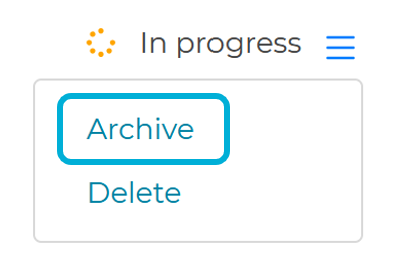
ArchiveYou can archive a submission that you no longer want to see on your current list of submissions. For example, you may want to archive past submissions that are completed and have no further action required. | |
Note: Archived submissions can always be unarchived if needed. | |
To archive a submission, you’ll first need to log into the funder's application portal (ending in .smartygrants.com.au). Once logged in:
|  |
UnarchiveTo unarchive a submission:
| 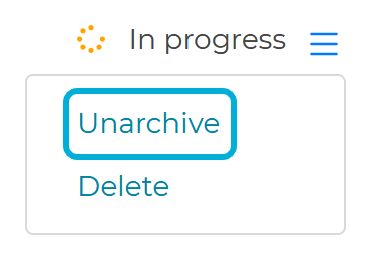 |
Optional - Enabling multi factor authentication (MFA)
As an extra layer of security, you may opt to use an authenticator mobile app (such as Google Authenticator or Authy) each time you log in. | |
To enable multi-factor authentication:
| 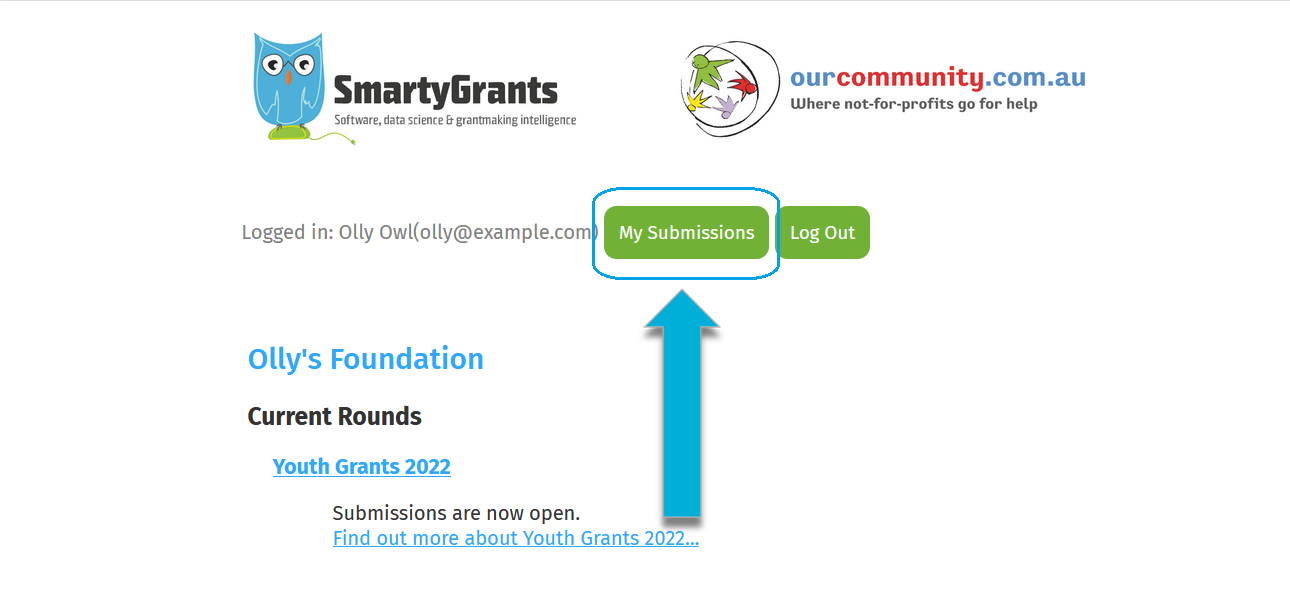  |
Note: Each funder’s application portal will have a different visual appearance. While all portals will show a link or a button titled My Submissions, the appearance of the link/button will differ from the example shown in the images to the right. | |
SmartyGrants will show a notification that reads MFA is enabled. You’ll complete setup the next time you log in. MFA will now be enabled on the account. | 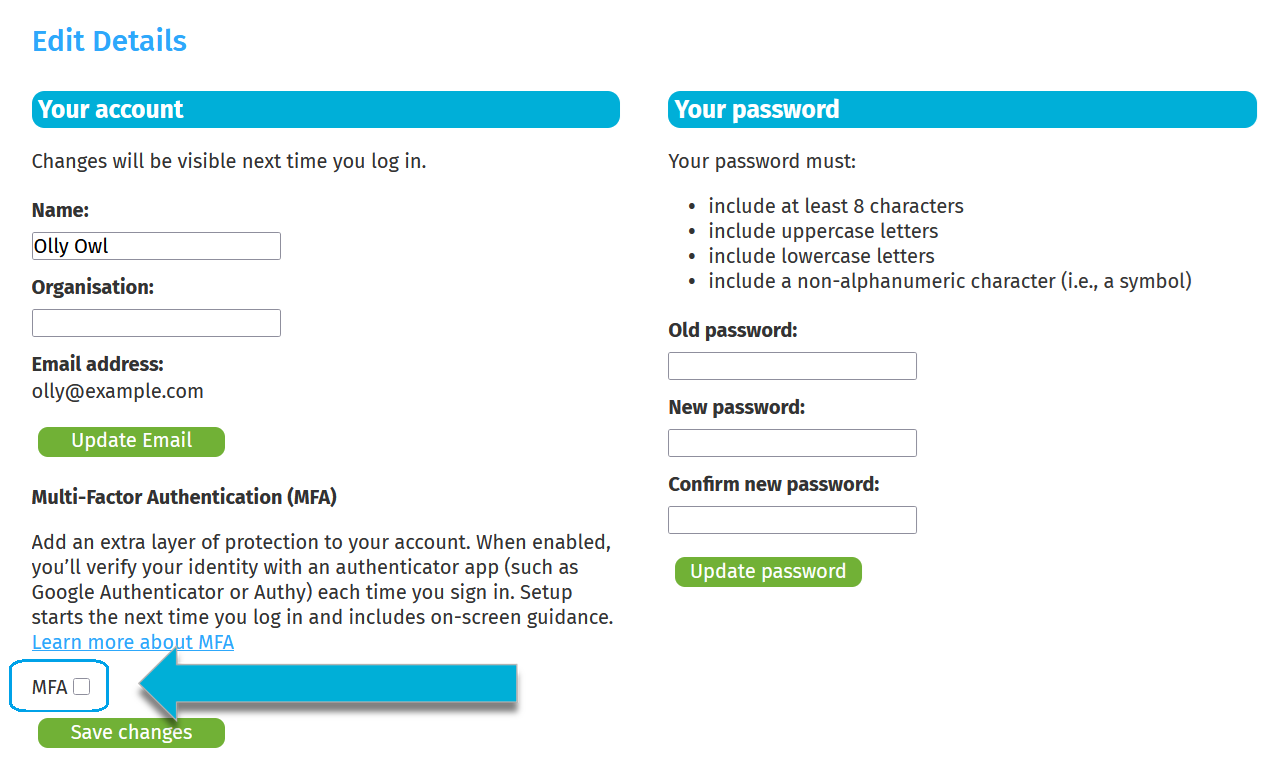 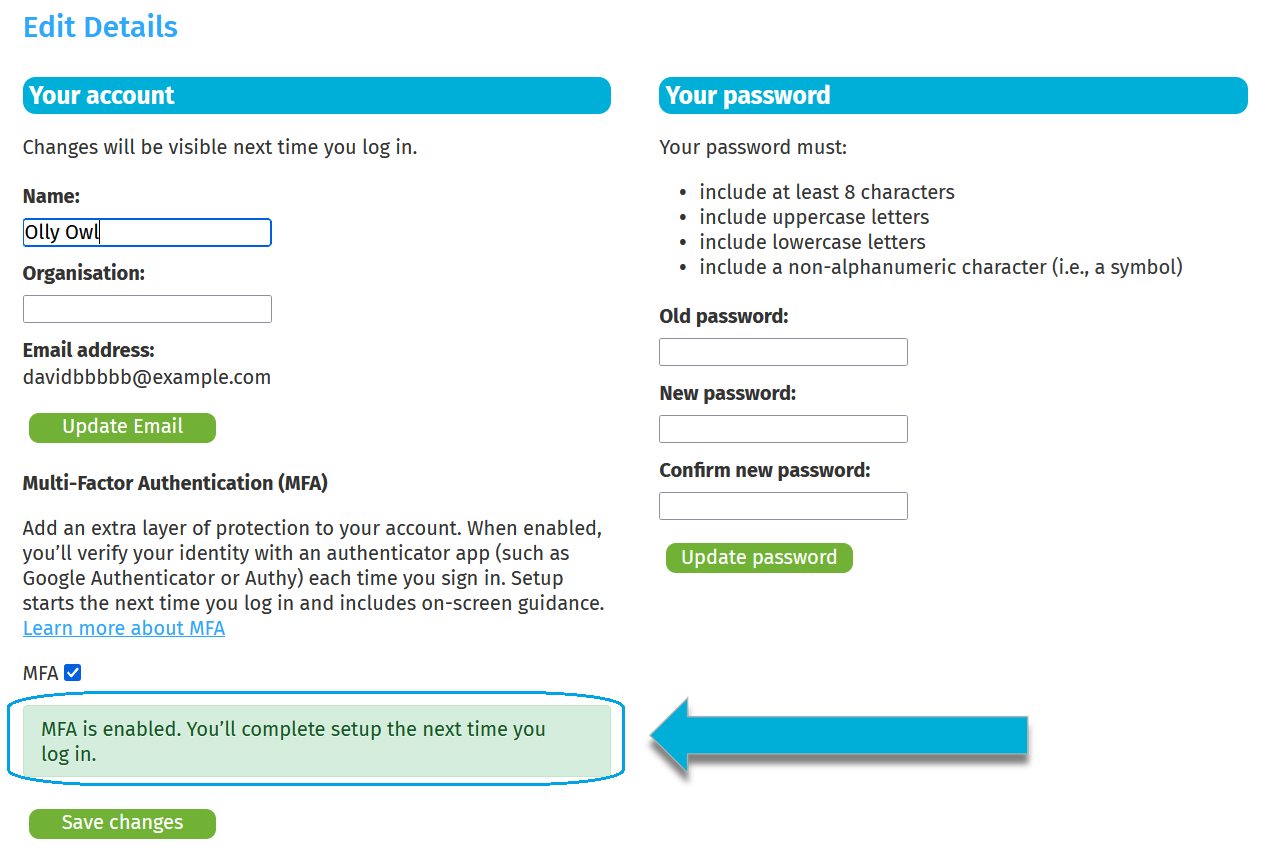 |
Upon next login, you will be met with the Multi-Factor Authentication Setup screen. Follow the prompts and enter the 6-digit code provided by your authenticator app to complete the setup. | 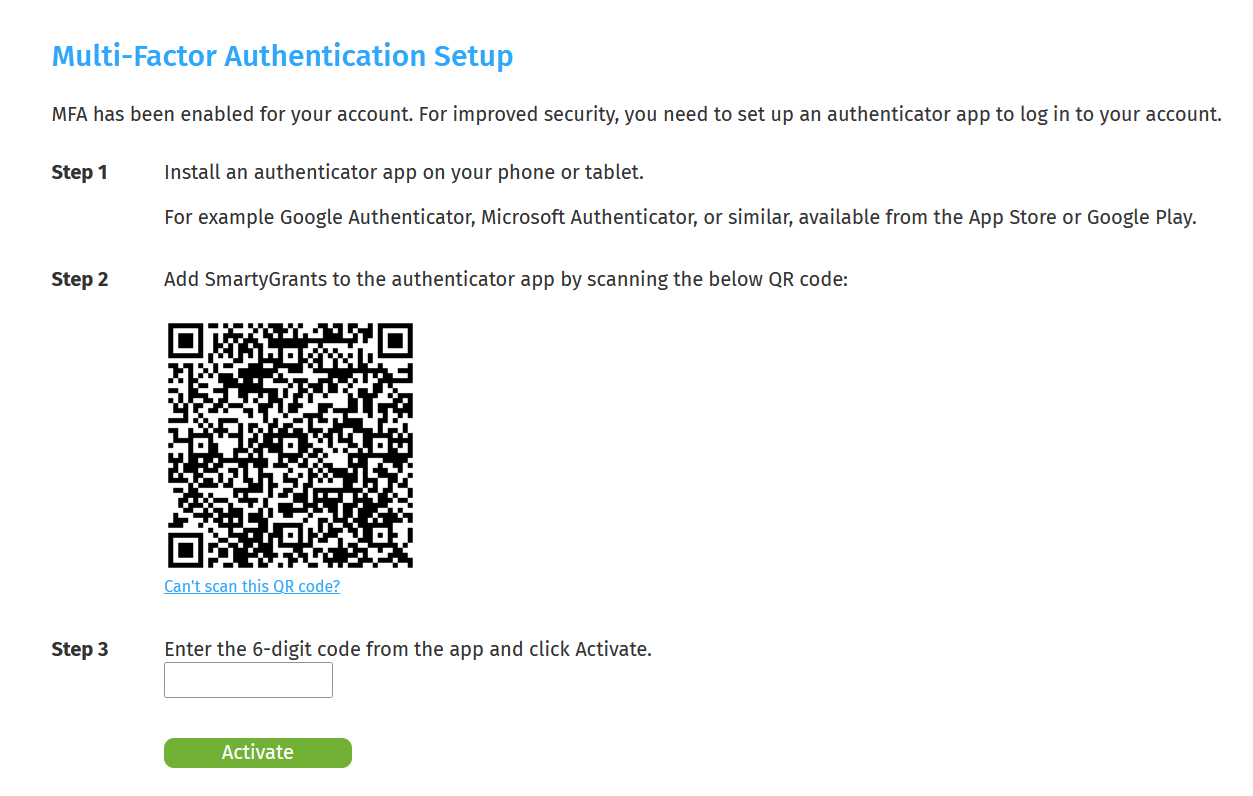 |
Frequently Asked Questions (FAQ's)
For a full list of frequently asked questions, please see our FAQs page. |